EN
EN


Home Vegetable Garden Renovation Plan: The Perfect Combination of Vermiculite for Seedlings and Gravel for Garden Paths
For home gardening enthusiasts, a small private vegetable garden is an excellent choice for achieving self-sufficiency and creating a natural living atmosphere. However, many DIY vegetable gardens suffer from common issues—such as low seed germination rates, seedling root rot, soil compaction and waterlogging, muddy and cluttered layouts, rampant weeds, and high maintenance demands—which severely compromise the gardening experience and crop yields.
This renovation project adopts an integrated approach focusing on "improved planting quality, garden beautification, and low maintenance." It employs a classic combination of vermiculite-enhanced growing media for seedlings and organized gravel pathways. Using cost-effective and easy-to-implement construction methods, the project resolves key maintenance pain points while ensuring high vegetable yields, a neat and attractive garden, and long-term ease of care. It is suitable for the renovation needs of most detached home gardens, terrace courtyards, and outdoor vegetable patches.
I. Key Pain Points of Traditional Home Vegetable Gardens
Before renovation, typical home vegetable gardens present distinct drawbacks that frequently frustrate gardening beginners:
Low seedling survival rates: Ordinary garden soil often has poor aeration and uneven water retention; it may harbor pathogens and weed seeds, causing vegetable seeds to mold and seedlings to succumb to "damping-off" disease (leading to root rot and death). Repeated attempts at raising seedlings are time-consuming and labor-intensive.
Soil compaction and waterlogging: Long-term watering and fertilization cause soil hardening, hindering root respiration. Severe water accumulation during the rainy season stunts vegetable growth, resulting in weak, spindly plants.
Disorganized garden layout: Without dedicated pathways, activities like harvesting, watering, and fertilizing require stepping directly onto the garden soil. This compacts the earth and creates muddy conditions on rainy days or dusty environments on sunny days.
Rampant weed growth: Large areas of exposed soil allow weeds to proliferate aggressively, competing with vegetables for nutrients. Manual weeding is time-consuming and labor-intensive, resulting in high maintenance costs.
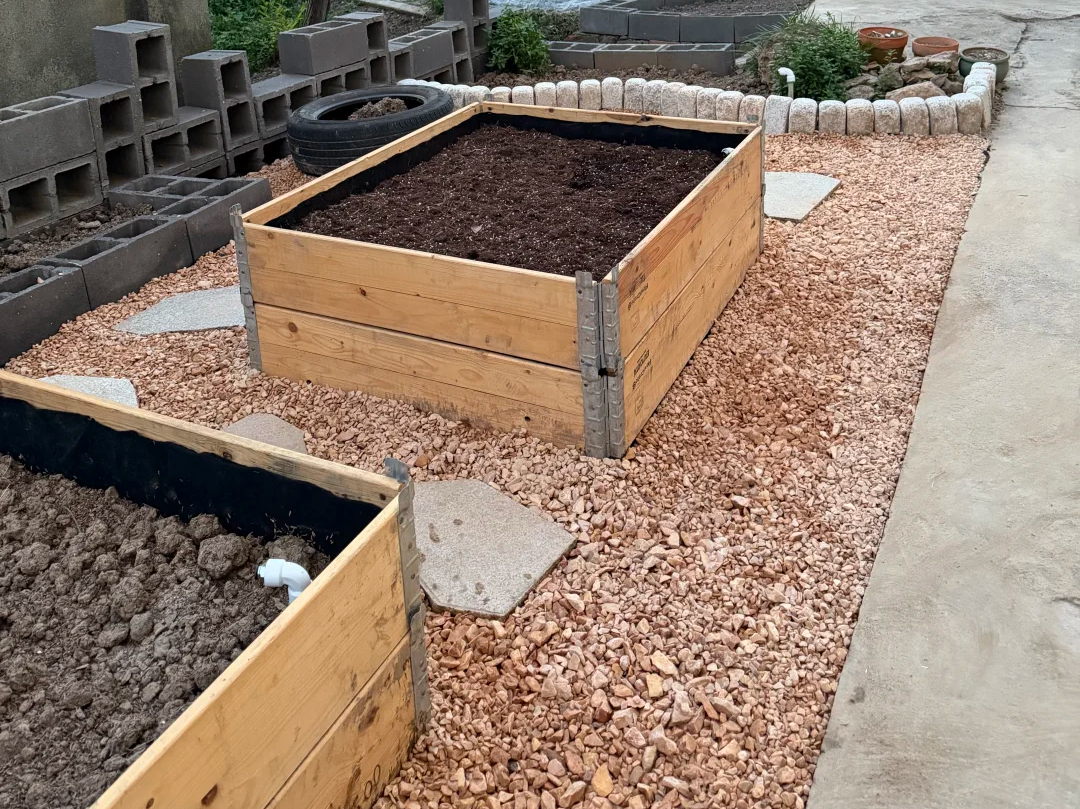
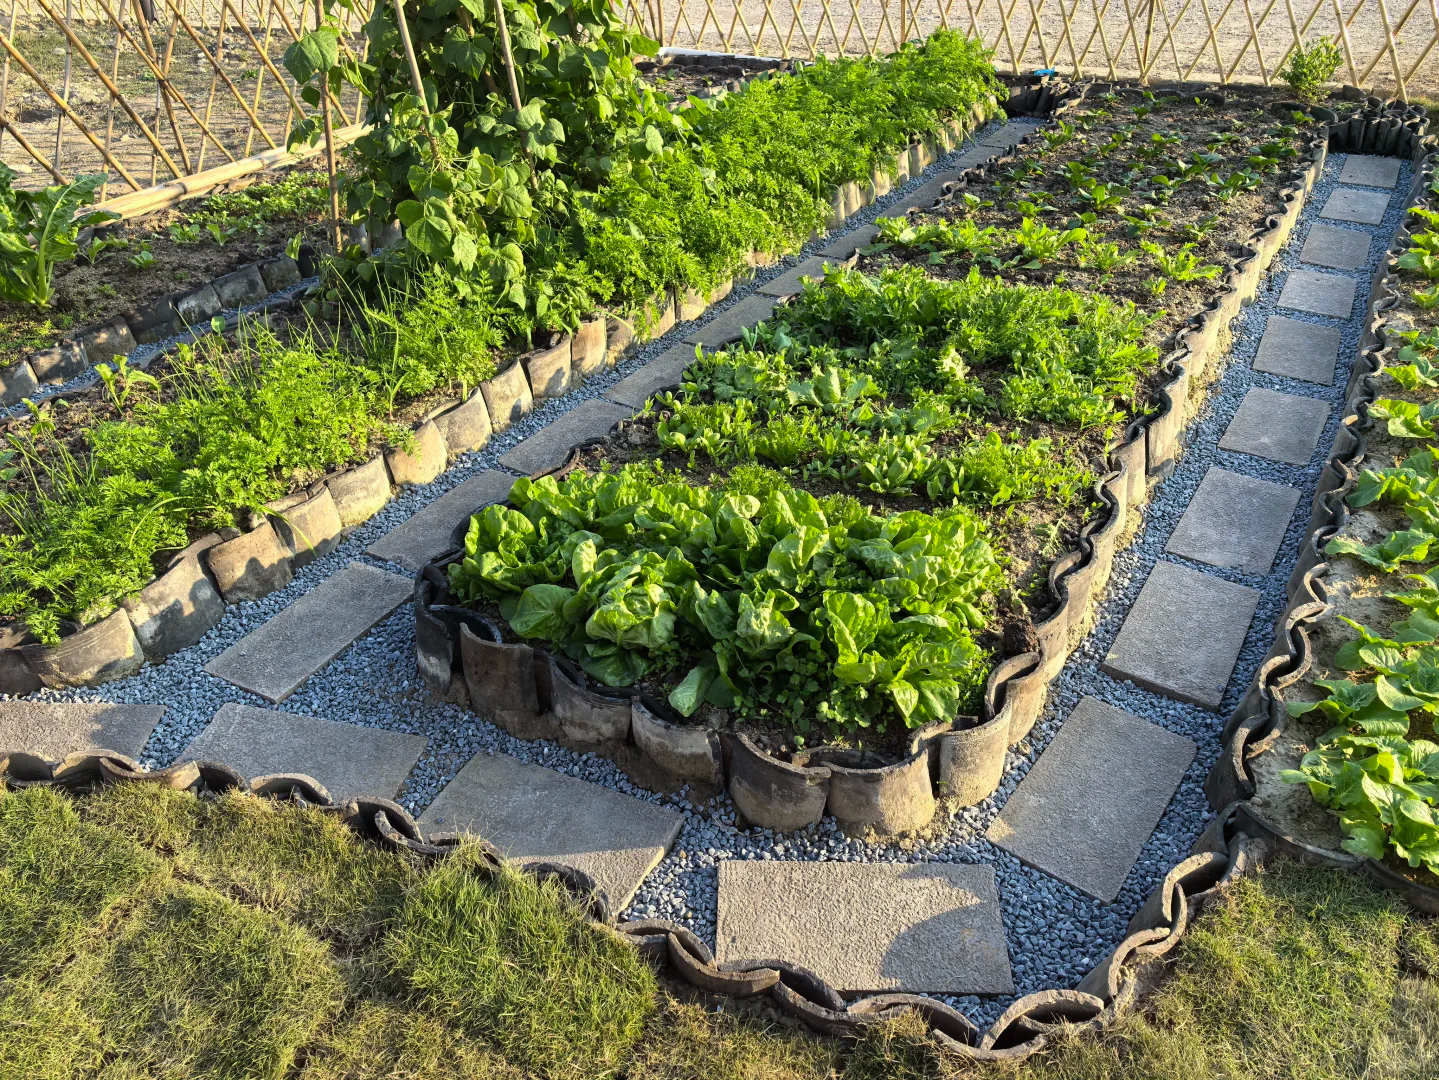
To address these issues, the renovation optimizes specific zones: the planting area utilizes a vermiculite-amended substrate to improve seedling and crop quality, while the access area features gravel pathways to create an eco-friendly walkway, achieving a dual upgrade in both functionality and aesthetics.
II. Key Modification Materials: The Advantages of Vermiculite & Gravel
1. Seed-Starting Vermiculite: A Core Substrate for Quality Vegetable Gardening
Vermiculite is a premium natural material for home gardening—ideal for starting seedlings and improving soil. Processed via high-temperature expansion, it is sterile, non-toxic, and highly stable. It perfectly meets the needs of starting and growing various leafy greens and fruiting vegetables, offering distinct advantages:
Sterile and safe, preventing seedling diseases: High-temperature processing eliminates insect eggs, weed seeds, and pathogens. It prevents issues like seedling damping-off and root rot at the source, significantly boosting survival rates and ensuring success even for beginners.
Breathable and moisture-retentive, regulating soil humidity: Its porous, honeycomb-like structure offers excellent aeration, breaking up compacted soil and allowing vegetable roots to breathe freely. It also locks in moisture and nutrients, releasing them slowly after watering to prevent uneven moisture levels and reduce the hassle of frequent watering.
Soil improvement and long-term soil health: It naturally regulates soil pH. When mixed with garden soil, it continuously optimizes soil structure and prevents salinization, actually enriching the soil over time with continued use.
Highly adaptable and easy to use: It can be used alone for starting seedlings or mixed with garden soil or potting mix. It is suitable for various planting methods, including container gardening, in-ground planting, and seed trays.
2. Garden Path Gravel: The Secret to a Neat, Low-Maintenance Yard
Compared to paved or concrete paths, gravel paths are better suited to the natural, ecological style of a small vegetable garden. They offer superior cost-effectiveness, simple installation, and hassle-free maintenance, making them the ideal choice for upgrading the layout of a home vegetable garden:
Excellent Drainage, No More Mud: The gaps between gravel pieces allow for rapid drainage during rain, preventing water accumulation. This completely eliminates muddy, slippery paths, keeping the area dry and tidy year-round.
Weed and Dust Control, Low Maintenance: When laid over geotextile fabric, gravel effectively blocks weed growth and prevents dust from bare soil. It eliminates the need for frequent weeding or sweeping, significantly reducing long-term maintenance costs.
Natural Aesthetic, Enhanced Visual Appeal: Natural gravel offers an earthy texture that complements various garden styles. It creates a seamless transition between planting and leisure areas, giving the small garden a neat, well-structured, and layered look.
Easy Installation, Low Cost: No heavy machinery is required; the job can be done by a single person. The path is ready for use immediately after installation, is durable against cracking or damage, and boasts a long lifespan.
III. Comprehensive Practical Plan for Small Vegetable Garden Renovation
This renovation follows a "zoned construction, plant-then-pave, step-by-step" approach. It consists of two main phases: optimizing the seedling/planting area with vermiculite and laying gravel for walkways. The entire process is simple to execute and requires no specialized technical skills.
(I) Seedling and Planting Area: Scientific Use of Vermiculite
1. Specialized Method for Vegetable Seedlings (Germination Stage)
Suitable for starting seeds of various vegetables—such as lettuce, spinach, cilantro, tomatoes, and peppers—achieving survival rates of over 95%: Spread a 2–3 cm layer of pure seedling-grade vermiculite at the bottom of the seedling tray. Sow seeds evenly, then lightly cover with a thin layer of fine vermiculite, pressing gently to ensure good contact between the seeds and the substrate. Water gently using a spray bottle to avoid dislodging the seeds; cover with plastic wrap or a transparent lid to retain moisture, removing it once the seedlings emerge. Using pure vermiculite eliminates concerns about waterlogging or seed rot, resulting in uniform germination and consistent growth.
2. Soil Improvement for In-Ground Vegetable Gardens (Mature Plant Stage)
For compacted or nutrient-poor native garden soil, mix in vermiculite at a ratio of 2:8 or 3:7 (vermiculite to garden soil) and till to a depth of 20–30 cm, ensuring the materials are thoroughly blended. The resulting soil mixture is loose, well-aerated, and capable of retaining both water and nutrients; this effectively resolves issues with soil compaction and waterlogging, encourages deep root penetration, and promotes vigorous vegetable growth and higher yields. During routine maintenance, a layer of vermiculite can also be spread over the soil surface to help retain moisture, prevent compaction, and protect the root system.
(II) Garden Path: Standardized Gravel Installation Steps
The path utilizes natural gravel with a particle size of 5–10 mm—chosen for its uniformity, comfort underfoot, and resistance to scattering—making it ideal for access within a home vegetable garden. The specific installation steps are as follows:
Base Preparation and Compaction: Clear the path area of weeds, loose stones, and debris; level the ground and compact the soil in layers. Incorporate a slight slope to ensure smooth drainage and prevent future issues with soil settlement or water pooling.
Laying Permeable Geotextile: Install a layer of heavy-duty, weed-suppressing geotextile across the entire path. Overlap edges by at least 15 cm and secure them firmly with fasteners; this effectively blocks weed growth while preventing soil from migrating upward and gravel from sinking into the ground.
Defining Edges and Boundaries: Based on the garden layout, secure the path boundaries using rot-resistant timber, stone, or specialized edging strips. This delineates planting zones from walkways, preventing gravel scatter and maintaining an organized circulation path.
Spreading and Leveling Gravel: Spread the gravel evenly to a depth of 3–4 cm. Use a rake to smooth the surface, ensuring it is level and uniform so that it compacts firmly underfoot without shifting. For maximum stability, a small amount of gravel-binding adhesive can be applied to prevent loose stones from scattering.
IV. Overall Transformation Results and Key Advantages
1. Planting Perspective: Enhanced Quality and Yield, Simplified Maintenance
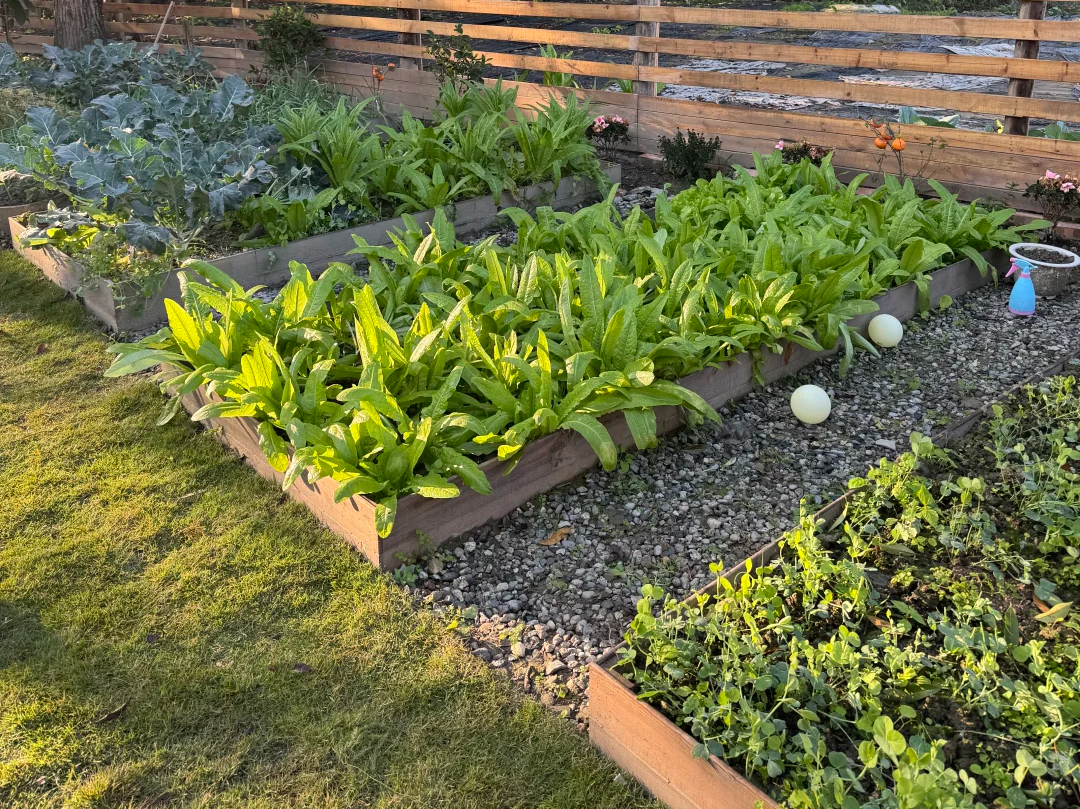
In planting zones improved with vermiculite, soil aeration and water retention are significantly enhanced. Vegetable seedlings emerge uniformly without issues like root rot or seedling loss; mature plants develop robust root systems and grow vigorously. Pest and disease incidence is effectively reduced, and the need for frequent watering and fertilization is minimized, allowing even beginners to easily grow high-quality, high-yield vegetables. Additionally, the sterile substrate eliminates weed seeds, drastically reducing the workload associated with weeding.
2. Garden Perspective: Neat and Aesthetic, Low-Maintenance and Durable
The orderly gravel paths create clear circulation routes within the garden, eliminating problems such as messy bare soil, muddy conditions during rain, and dust clouds on sunny days. The overall garden appears clean, tidy, and well-structured. Gravel pathways are corrosion-resistant, durable against aging, and robust, eliminating the need for frequent repairs; a single installation offers long-term utility, significantly reducing garden maintenance costs.
3. Cost-effectiveness: High value and accessible to beginners
The renovation requires neither complex materials nor professional contractors. Horticultural vermiculite and garden gravel are cost-effective materials with low procurement costs and controllable usage. The installation process is simple and convenient—easily completed by a single person—offering exceptional value compared to full-scale hardscaping or major landscaping renovations, making it ideal for upgrading most residential gardens.
V. Summary of Suitable Scenarios
This "vermiculite and gravel pathway" vegetable garden renovation plan is suitable for a wide range of settings, including detached home gardens, terrace planting areas, entryway vegetable patches, and small-scale home growing plots. It is perfectly adaptable for everything from first-time DIY projects to the refurbishment of existing vegetable gardens.
By using lightweight vermiculite to address key planting challenges and eco-friendly gravel to enhance garden aesthetics and circulation, this solution balances practicality, beauty, cost-efficiency, and low maintenance. It creates a high-yielding, tidy, and hassle-free immersive home garden, allowing you to effortlessly enjoy a lifestyle of year-round vegetable growing and scenic garden views.